Three.js: An Introductory Tutorial
Three.js is a JavaScript library that makes creating 3D graphics on the web much easier than directly using WebGL. In this introductory tutorial, we will see how to create a scene, add geometrical shapes, add lights and shadows, load 3D models from files, move things around and more.
Three.js is, in part, a scene graph. A scene graph operates very much like the DOM in traditional JavaScript web development. It is a hierarchical graph that defines everything about the 3D scene. The position, rotation and scaling of all objects are relative to their parent, so you can easily moves groups of objects around a scene by making them all children of one group object.
Programming directly in WebGL is really just sending raw data to the graphics card. If you were writing a 3D engine from scratch, one of the very first things you would do is create a scene graph to organize all that data into something useable. This is where Three.js fits into your application. It sits at a low enough level that it doesn't dictate anything about the structure of the rest of your application, making it very well suited for adding to existing applications or web sites.
Installation
- Download Three.js from the Three.js website.
- Extract the downloaded file.
- Create a "js" folder under your main website folder.
- From the Three.js extraction folder, copy the contents of the "build" and "examples/js" folders to your "js" folder.
The build folder contains just the base functionality of Three.js. Many other important features are, oddly enough, stored in the examples folder, so we copy them both. For development purposes, it is helpful to have everything available at all times. When you deploy, you will take only the files you need.
HTML
This being a web-based technology, we need a little HTML to get started. All we really need is a canvas for rendering the 3D scene and the script tags to load three.js and the GLTFLoader, which we will use later on. We will place our code in the empty script tag.
<!DOCTYPE html>
<html>
    <head>
        <meta charset=utf-8>
        <title>Three.js Intro</title>
    </head>
    <body>
        <canvas id="3d-canvas" width="800" height="600"></canvas>
        <script src="js/three.js"></script>
        <script src="js/loaders/GLTFLoader.js"></script>
        <script>
        </script>
    </body>
</html>
Basic Scene Setup
In order to get something drawn on the screen, we need three things: a Scene, a Camera and a WebGLRenderer. The most basic scene has no objects in it, just a background color.
var scene, camera, glRenderer;

function init() {
    var canvas = document.getElementById('3d-canvas');

    // Create the scene
    scene = new THREE.Scene();
    scene.background = new THREE.Color(0x444444);

    // Create the camera
    var fov = 75;
    var aspectRatio = canvas.width / canvas.height;
    var nearPlane = 0.1;
    var farPlane = 1000;
    camera = new THREE.PerspectiveCamera( fov, aspectRatio, nearPlane, farPlane );

    // Create the WebGLRenderer
    glRenderer = new THREE.WebGLRenderer({ canvas: canvas, antialias: true });
}

init();

// Render the scene using the camera
glRenderer.render( scene, camera );
Meshes
A visible object in Three.js is called a Mesh. A Mesh is defined by a Geometry and Material object.
The Geometry object defines the shape. It stores information about the vertices, faces, uvs, vertex colors, etc.
The Material object defines how a Mesh is rendered. It stores the information about how the object interacts with light sources, textures, bump maps, shaders, etc.
Three.js includes many convenience classes for generating common geometrical shapes, but you can also programmatically create raw geometry or load a Mesh from a file exported from a 3D modelling tool like Blender or Maya.
Let's add a floor and a box in the init() function we just created.
function init() {
    var canvas = document.getElementById('3d-canvas');

    // Create the scene
    scene = new THREE.Scene();
    scene.background = new THREE.Color(0x444444);

    // Create the camera
    var fov = 100;
    var aspectRatio = canvas.width / canvas.height;
    var nearPlane = 0.1;
    var farPlane = 100;
    camera = new THREE.PerspectiveCamera( fov, aspectRatio, nearPlane, farPlane );

    // Create the WebGLRenderer
    glRenderer = new THREE.WebGLRenderer({ canvas: canvas, antialias: true });

    // Add a floor to the scene
    var floorWidth = 20;
    var floorHeight = 40;
    var floorGeometry = new THREE.PlaneGeometry(floorWidth, floorHeight);
    var floorMaterial = new THREE.MeshStandardMaterial( { color: 0x009900 } );
    var floorMesh = new THREE.Mesh(floorGeometry, floorMaterial);

    // A Plane is created standing vertically.
    // Let's rotate it so that is lays flat.
    floorMesh.position.set( 0, -1, -3 );
    floorMesh.rotation.set( -Math.PI/2, 0, 0 );
    scene.add(floorMesh);

    // Add a box to the scene
    var boxWidth = 1;
    var boxHeight = 2;
    var boxDepth = 1;
    var boxGeometry = new THREE.BoxGeometry(boxWidth, boxHeight, boxDepth);
    var boxMaterial = new THREE.MeshStandardMaterial( { color: 0x00ffff });
    var boxMesh = new THREE.Mesh(boxGeometry, boxMaterial);
    boxMesh.position.set(-2, 1, -5);

    scene.add(boxMesh);
}
But why are the shapes black instead of the color we assigned their materials? Well, we haven't added any lights yet.
Lighting and Shadows
There are a few different kinds of lights: Ambient, Hemisphere, Directional, RectArea, Point and Spotlight. Each type of light has a color as well as many parameters for each type that determines its behavior. The lights in the scene along with a Mesh's material determine how a Mesh will be drawn on the screen.
Directional, RectArea, Point and Spotlights are able to cast shadows if you enable them. Each Mesh is also capable of casting a shadow and receiving a shadow. There is a lot of flexibility with this system.
Let's add an Ambient and a Point light and turn on some shadows.
function init() {
    var canvas = document.getElementById('3d-canvas');

    // Create the scene
    scene = new THREE.Scene();
    scene.background = new THREE.Color(0x444444);

    // Create the camera
    var fov = 100;
    var aspectRatio = canvas.width / canvas.height;
    var nearPlane = 0.1;
    var farPlane = 100;
    camera = new THREE.PerspectiveCamera( fov, aspectRatio, nearPlane, farPlane );

    // Create the WebGLRenderer
    glRenderer = new THREE.WebGLRenderer({ canvas: canvas, antialias: true });

    // Add a floor to the scene
    var floorWidth = 20;
    var floorHeight = 40;
    var floorGeometry = new THREE.PlaneGeometry(floorWidth, floorHeight);
    var floorMaterial = new THREE.MeshStandardMaterial( { color: 0x009900 } );
    var floorMesh = new THREE.Mesh(floorGeometry, floorMaterial);

    floorMesh.position.set( 0, -1, -3 );
    floorMesh.rotation.set(-Math.PI/2, 0, 0 );

    scene.add(floorMesh);

    // Add a box to the scene
    var boxWidth = 1;
    var boxHeight = 2;
    var boxDepth = 1;
    var boxGeometry = new THREE.BoxGeometry(boxWidth, boxHeight, boxDepth);
    var boxMaterial = new THREE.MeshStandardMaterial( { color: 0x00ffff });
    var boxMesh = new THREE.Mesh(boxGeometry, boxMaterial);
    boxMesh.position.set(-2, 1, -5);

    scene.add(boxMesh);

    // Add the Lights
    // Ambient light is used to prevent the scene
    // from ever being too dark.
    var ambient = new THREE.AmbientLight(0x333333);
    scene.add(ambient);

    // A point light acts like a light bulb, sending light
    // in all directions.
    var lightIntensity = 1;
    var pointLight = new THREE.PointLight(0xffffff, lightIntensity);
    pointLight.position.set(2, 4, -2);
    scene.add(pointLight);

    // Enable Shadows
    // The floor will only receive shadows, but the box can both
    // cast and receive shadows.
    glRenderer.shadowMap.enabled = true;

    floorMesh.receiveShadow = true;

    boxMesh.receiveShadow = true;
    boxMesh.castShadow = true;

    pointLight.castShadow = true;
}
Animation Loop
Of course, a single image isn't very interesting. It needs to animate. There is no special magic for this, you just render a frame and call requestAnimationFrame() as you would for any other kind of animation.
Let's add a few more boxes so we have something to work with. We will update their rotations in the update function that will get called every frame.
var scene, camera, glRenderer;
var boxes;

function init() {
    var canvas = document.getElementById('3d-canvas');

    // Create the scene
    scene = new THREE.Scene();
    scene.background = new THREE.Color(0x444444);

    // Create the camera
    var fov = 100;
    var aspectRatio = canvas.width / canvas.height;
    var nearPlane = 0.1;
    var farPlane = 100;
    camera = new THREE.PerspectiveCamera( fov, aspectRatio, nearPlane, farPlane );

    // Create the WebGLRenderer
    glRenderer = new THREE.WebGLRenderer({ canvas: canvas, antialias: true });

    // Add a floor to the scene
    var floorWidth = 20;
    var floorHeight = 40;
    var floorGeometry = new THREE.PlaneGeometry(floorWidth, floorHeight);
    var floorMaterial = new THREE.MeshStandardMaterial( { color: 0x009900 } );
    var floorMesh = new THREE.Mesh(floorGeometry, floorMaterial);

    floorMesh.position.set( 0, -1, -3 );
    floorMesh.rotation.set(-Math.PI/2, 0, 0 );

    scene.add(floorMesh);

    // Create the boxes
    boxes = [];

    var boxWidth = 0.9;
    var boxHeight = 2;
    var boxDepth = 0.2;
    var boxGeometry = new THREE.BoxGeometry(boxWidth, boxHeight, boxDepth);
    var boxMaterial = new THREE.MeshStandardMaterial( { color: 0x00ffff });

    for(var i=0; i<14; i++) {
        var boxMesh = new THREE.Mesh(boxGeometry, boxMaterial);
        boxMesh.position.set(i-7, 1, -5);
        boxMesh.receiveShadow = true;
        boxMesh.castShadow = true;

        scene.add(boxMesh);

        boxes.push(boxMesh);
    }

    // Add Lights
    var ambient = new THREE.AmbientLight(0x333333);
    scene.add(ambient);

    var pointLight = new THREE.PointLight(0xffffff, 1);
    pointLight.position.set(2, 4, -2);
    scene.add(pointLight);

    // Enable Shadows
    glRenderer.shadowMap.enabled = true;

    floorMesh.receiveShadow = true;

    pointLight.castShadow = true;
}

// update() is called every frame.
// We rotate each box around the X-axis at slightly
// different speeds to create a neat pattern.
function update () {
    for(var i=0; i<boxes.length; i++) {
        boxes[i].rotateX(Math.PI/(100+i));
    }

    glRenderer.render( scene, camera );

    requestAnimationFrame( update );
}

init();
update();
Textures
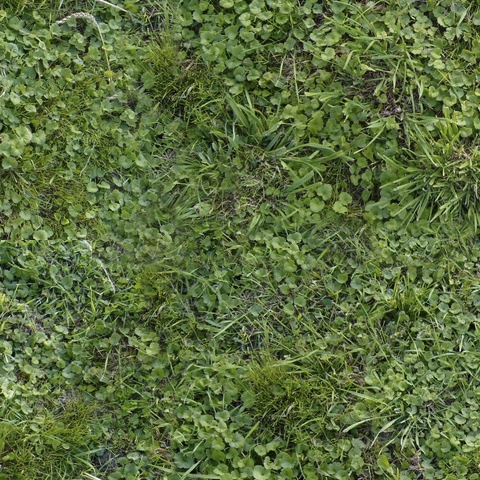
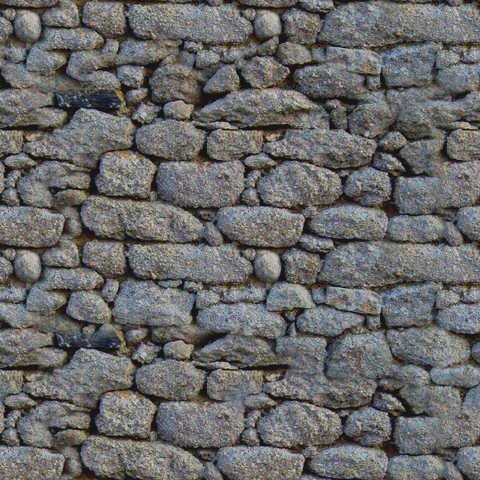
Adding textures is very easy with Three.js. There is a built-in image loader than can open just about any image format.
Textures are added to a material, much like setting the color, and the uv coordinates are set in the geometry of a Mesh. The built-in geometry shapes have uvs already created, but you can also set these programmatically for procedurally generated geometry, or, more typically, they are loaded with a Mesh when exported from a 3D modelling application.
For this example, I used two textures from OpenGameArt.org: grass1.png and stone wall 4.png.
var scene, camera, glRenderer;
var boxMesh;

function init() {
    var canvas = document.getElementById('3d-canvas');

    var floorWidth = 20;
    var floorHeight = 40;

    var boxWidth = 7;
    var boxHeight = 2;

    // Create the scene
    scene = new THREE.Scene();
    scene.background = new THREE.Color(0x444444);

    // Create the camera
    var fov = 100;
    var aspectRatio = canvas.width / canvas.height;
    var nearPlane = 0.1;
    var farPlane = 100;
    camera = new THREE.PerspectiveCamera( fov, aspectRatio, nearPlane, farPlane );

    // Create the WebGLRenderer
    glRenderer = new THREE.WebGLRenderer({ canvas: canvas, antialias: true });

    // Load Textures
    var textureLoader = new THREE.TextureLoader();

    var grass = textureLoader.load( 'grass1.png' );
    grass.wrapS = THREE.RepeatWrapping;
    grass.wrapT = THREE.RepeatWrapping;
    grass.repeat.set( floorWidth/2, floorHeight/2 );

    var stone = textureLoader.load( 'stone wall 4.png' );
    stone.wrapS = THREE.RepeatWrapping;
    stone.wrapT = THREE.RepeatWrapping;
    stone.repeat.set( boxWidth/2, boxHeight/2 );

    // Create the floor
    var floorGeometry = new THREE.PlaneGeometry(floorWidth, floorHeight);
    var floorMaterial = new THREE.MeshStandardMaterial( { map: grass,
                                                          metalness: 0.25,
                                                          roughness: 0.75 } );
    var floorMesh = new THREE.Mesh(floorGeometry, floorMaterial);

    floorMesh.position.set( 0, -1, -3 );
    floorMesh.rotation.set(-Math.PI/2, 0, 0 );

    scene.add(floorMesh);

    // Create a box
    var boxDepth = 0.2;
    var boxGeometry = new THREE.BoxGeometry(boxWidth, boxHeight, boxDepth);
    var boxMaterial = new THREE.MeshStandardMaterial( { map: stone,
                                                        metalness: 0,
                                                        roughness: 1 } );
    boxMesh = new THREE.Mesh(boxGeometry, boxMaterial);

    box.position.set(0, 1, -5);

    scene.add(boxMesh);

    // Add the Lights
    var ambient = new THREE.AmbientLight(0x333333);
    scene.add(ambient);

    var pointLight = new THREE.PointLight(0xffffff, 1);
    pointLight.position.set(2, 4, -2);
    scene.add(pointLight);

    // Enable Shadows
    glRenderer.shadowMap.enabled = true;

    floorMesh.receiveShadow = true;

    boxMesh.receiveShadow = true;
    boxMesh.castShadow = true;

    pointLight.castShadow = true;
}

// update() is called every frame.
function update () {
    boxMesh.rotateY(Math.PI/1000);

    glRenderer.render( scene, camera );

    requestAnimationFrame( update );
}

init();
update();
GLTF Loader
Most 3D assets are created in a 3D modelling application like Blender or Maya and exported to a file to load into a Three.js application. There are many of these formats supported by Three.js. GLTF (GL Transmission Format) is recommended for web use because of its efficient file size and loading speed.
In order to export to GLTF from Blender, you will need to install this GLTF export plugin.
For this example, I created a scene in Blender (download here) that just has two models, along with the ground and the camera. When I load the file, I get references to the models by name and use them as templates to create a scene. This is one way of creating a procedurally generated level, for instance.
var scene, camera, glRenderer;
var wallMesh, postMesh;

// Called on success loading of a GLTF file
function loadedGLTF(gltf) {
    var canvas = document.getElementById('3d-canvas');

    // Add the loaded scene
    scene.add(gltf.scene);

    // Enable Shadows
    gltf.scene.traverse(function (child) {
        if (child instanceof THREE.Mesh) {
            child.castShadow = true;
            child.receiveShadow = true;
        }
    });

    // Load the camera from the file
    camera = gltf.cameras[0];
    camera.aspect = canvas.width / canvas.height;
    camera.updateProjectionMatrix();

    // Load the template models
    postMesh = gltf.scene.getObjectByName('Post');
    wallMesh = gltf.scene.getObjectByName('Wall_5');

    // Create a scene by cloning the templates
    var p1 = postMesh.clone();
    p1.position.set(0, 0, 0);
    scene.add(p1);

    var w1 = wallMesh.clone();
    w1.position.set(0, 0, 0);
    scene.add(w1);

    var p2 = postMesh.clone();
    p2.position.set(5, 0, 0);
    scene.add(p2);

    var w2 = wallMesh.clone();
    w2.position.set(5, 0, 0);
    w2.rotateY(Math.PI/2);
    scene.add(w2);

    var p3 = postMesh.clone();
    p3.position.set(5, 0, -5);
    scene.add(p3);

    var w3 = wallMesh.clone();
    w3.position.set(5, 0, -5);
    w3.rotateY(Math.PI);
    scene.add(w3);

    var p4 = postMesh.clone();
    p4.position.set(0, 0, -5);
    scene.add(p4);
}

function init() {
    var canvas = document.getElementById('3d-canvas');

    // Create the scene
    scene = new THREE.Scene();
    scene.background = new THREE.Color(0x444444);

    // Create the WebGLRenderer
    glRenderer = new THREE.WebGLRenderer({ canvas: canvas, antialias: true });
    glRenderer.shadowMap.enabled = true;

    // Create the lights
    var ambient = new THREE.AmbientLight(0x333333);
    scene.add(ambient);

    var pointLight = new THREE.PointLight(0xffffff, 1);
    pointLight.position.set(2, 4, -2);
    pointLight.castShadow = true;
    scene.add(pointLight);

    // Load GLTF file
    // The loader takes the name of the file and callbacks
    // for success, in progress and error.
    var loader = new THREE.GLTFLoader();
    loader.load('three_gltf_example.glb', loadedGLTF,
                                          undefined,
                                          function (e) {
                                            console.error(e);
                                          } );
}

// update() is called every frame.
function update () {
    glRenderer.render( scene, camera );

    requestAnimationFrame( update );
}

init();
update();
Conclusion
You can see from these little examples how easy it is to get started with Three.js. It is a very powerful library, but I will say that the documentation is pretty poor. The best way to learn how to do things in Three.js is to study the examples very carefully. I had to struggle at points with Three.js before I realized just how important those examples are.
Another thing to mention is that Three.js is under very active development. If you run into any issues, check the GitHub Issues because it very well may be a bug that is being worked on.
If you are new to 3D graphics programming in general, you may want to see my guide on Web 3D Graphics Programming for Beginners, which is basically a list of things you need to learn when getting started with serious 3D programming.
I hope you have found this introductory tutorial helpful and please let me know if you have any questions or comments.